Edit
Report Profile:
- Report profiles need to be created before any reports can be generated.
- The report profile is the template from which the report will be generated, and specifies such things as the data source and chart type.
- Administrators shall have super user access in the Analytics module and shall be able to create or edit any Report Profile.
- To create a new Report Profile select ‘Start New - > Analytics -> Report Profile.
- Once a report profile has been created, it can be added to a users Dashboard as a Report or Favourite Report.
- Normal reports are accessed from the Analytics dropdown menu.
- Favourite reports will be displayed directly on the dashboard.
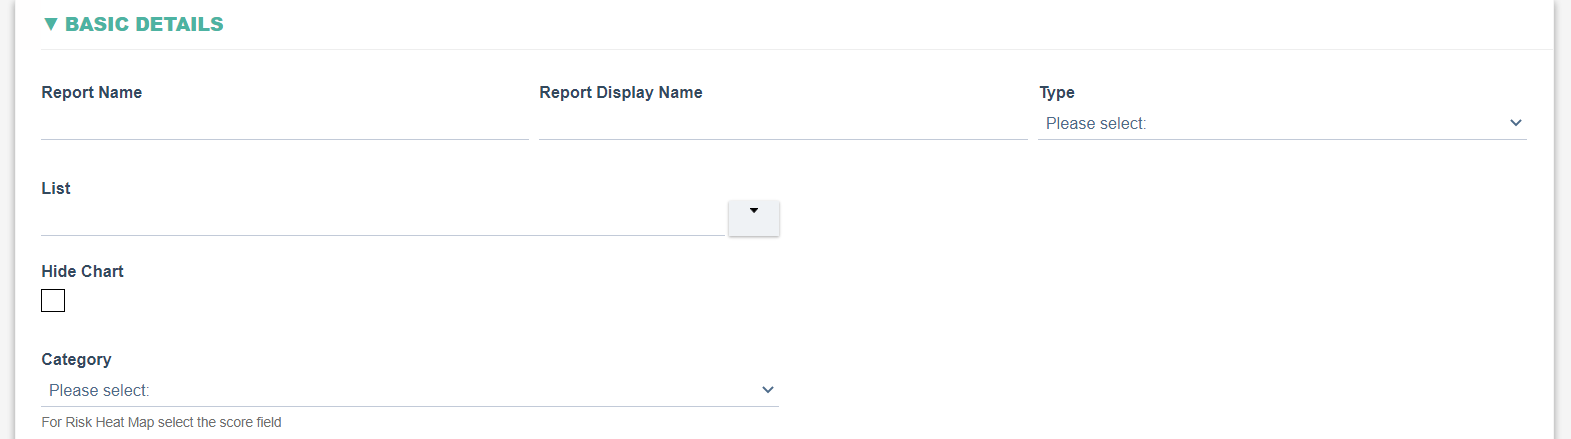
The Report Profile form contains the following data:
- The Basic Details section will be visible and editable.
|
Report Name: allow free text entry for the report's name. The name must be unique in the system. The name should be in upper case seperated by semicolons (e.g. ACTIONS_BY_TYPE) |
|
Report Display Name: Allow free text entry for the report's display name. The name must be unique in the system. The reports can be seperated into folders using the "/" symbol. For example, Actions / By Type would create a folder called Actions and a report within that folder called By Type. |
|
Type: allows selection of the type of report that will be generated. Options include: Column, Line – Cluster, Column – Stacked, Bar, Bar – Stacked, Line, Pie, Bar – Cluster, Column – Cluster and Risk Heat Map. |
|
List: Allow the selection of a list in the system, from which data for the report will be drawn. |
|
Hide Chart: Allow the user to set whether or not to display the chart in the report. |
|
Category: Allow the selection of the axis category for the chart, from all available columns in the selected List. |
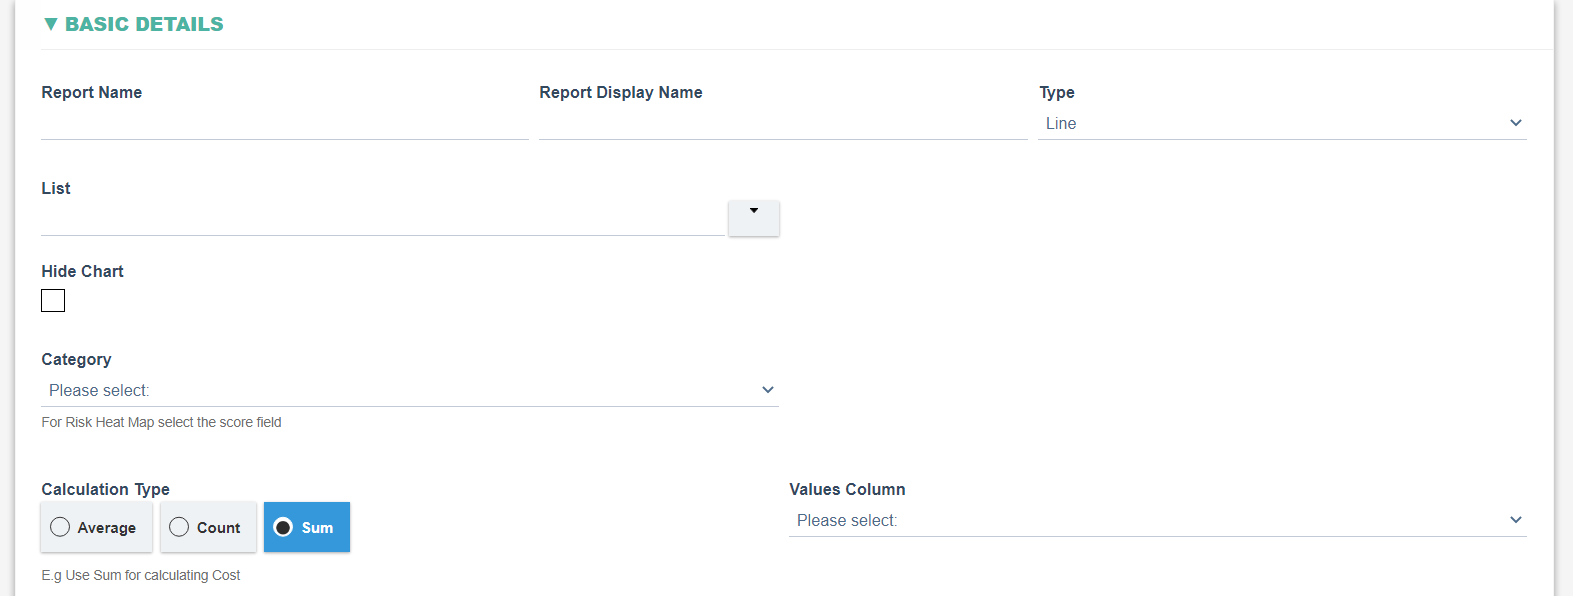
1. Selecting Bar, Column, Line or Pie as the Type will make the Calculation Type field visible. Selecting Count or Average as the Calculation Type will make the Values Column field visible.
|
Calculation Type: allow the selection of different calculations for the cart categories. Options include: ‘Count’, ‘Sum’ and ‘Average’. |
|
Values Column: Allows selection of the data to be used in the 'Average' or 'Sum' calculation. The selected column must only contain numbers to work correctly. |
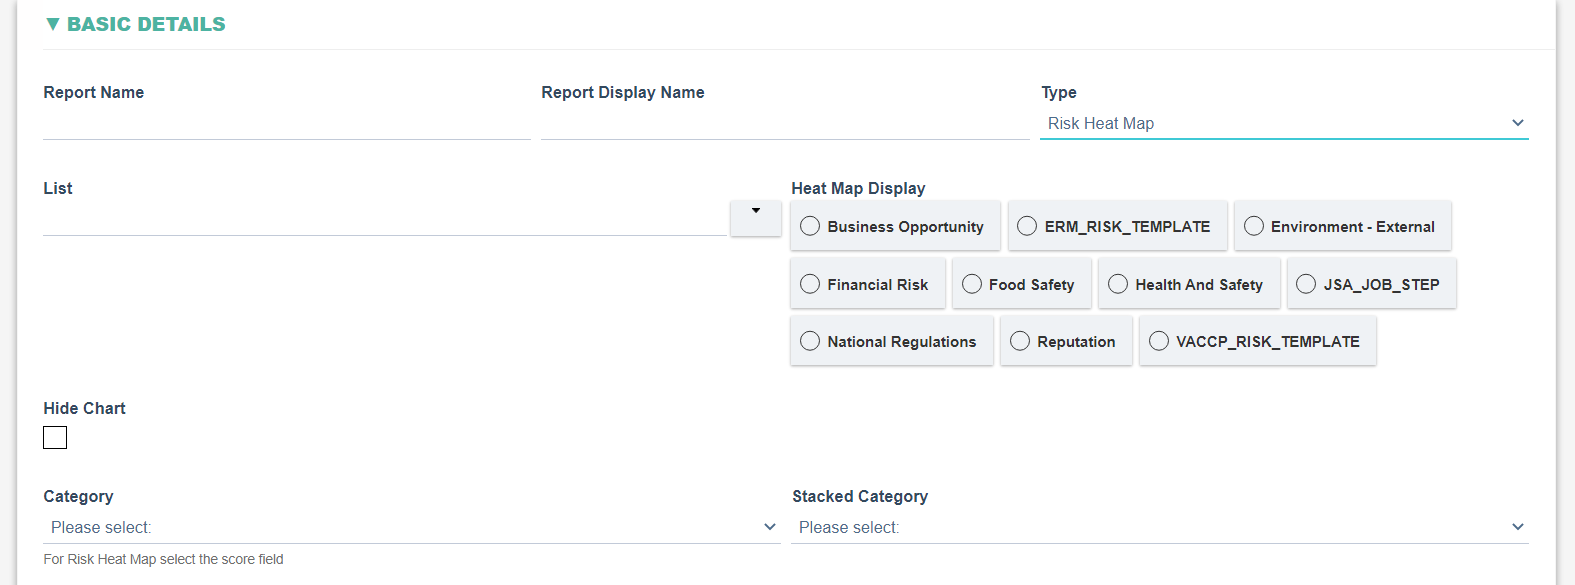
2. Selecting Risk Heat Map, Bar – Cluster, Bar – Stacked, Column – Cluster, Column – Stacked or Line – Cluster as the Type will make the Stacked Category field visible. Selecting Risk Heat Map will also make the Heat Map Display field visible.
|
Heat Map Display: allow selection from all available Risk Assessment Templates to be used in the heat map. |
|
Stacked Category: Allows the selection of the stack or cluster category for the chart, depending on the selected chart type. |
- The Schedule Report section will be visible and editable.
- When the Schedule this Report checkbox is selected, the option to schedule the report for a later date becomes available.
- When a report is scheduled the following shall occur:
- The scheduler shall run at a predefined time on a daily basis and a Scheduled Report Record shall be created and assigned to the users specified in the ‘Send Report to These Users’
- If the report’s Schedule Frequency is set to ‘Daily’ then the report record shall be created daily (on the predefined time)
- If the report’s Schedule Frequency is set to ‘Weekly’ then the report record shall be created from the date specified in the ‘Scheduled Day’ and then run on a weekly basis from that time forward
- If the report’s Schedule Frequency is set to ‘Monthly’ then the report record shall be created from the date specified in the ‘Scheduled Day’ and then run on a Monthly basis from that time forward

|
Schedule this Report?: Allows the user to set whether a report is to be scheduled or not |
|
Schedule Frequency: Allows selection from ‘Daily’, ‘Weekly’ or ‘Monthly’ |
|
Scheduled Day (of week/month): Displayed if Schedule Frequency is set as ‘Weekly’ or ‘Monthly’. Allows the user to select the first date for the scheduled report. |
|
Send Report to These Users: Allows the selection of one or more users in the system who will receive the report. |