Designing a Workflow Diagram
Follow the steps below to create a new workflow.
Step 1. Open the Camunda Modeler and open the Default Workflow provided (download Default Workflow)

↓
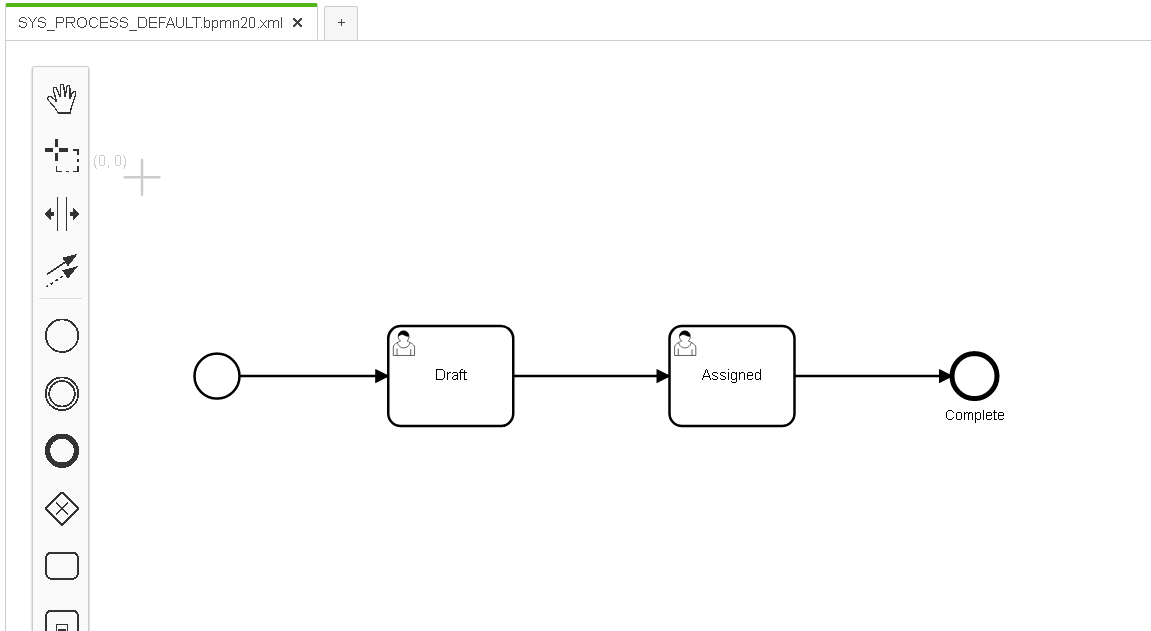
Step 2. The Default workflow is loaded with preset properties and three steps, Draft, Assigned and Complete
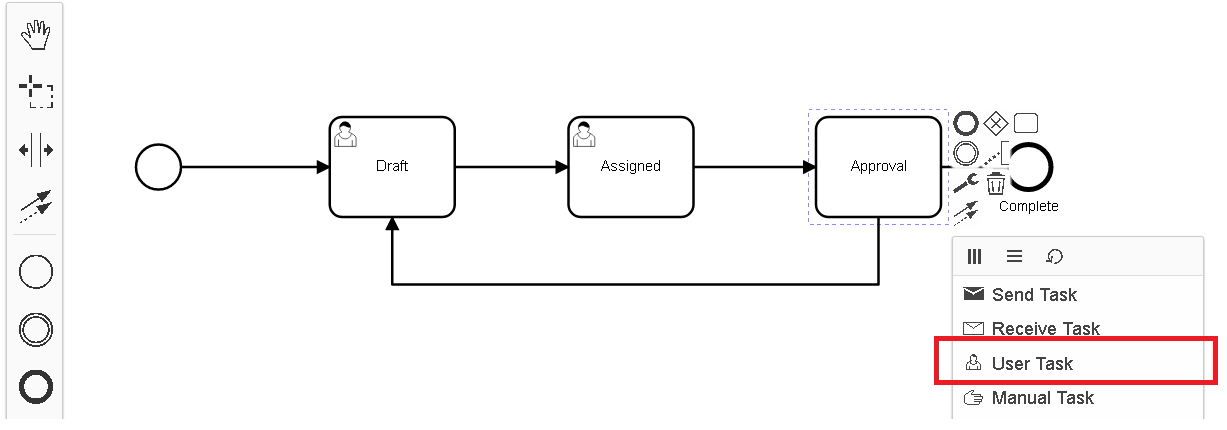
Step 3. Make changes by adding or deleting ![]() tasks into the workflow. For example lets add a task called Approval between Assigned and Complete tasks.
tasks into the workflow. For example lets add a task called Approval between Assigned and Complete tasks.
- Delete the Connector between Assigned and Complete
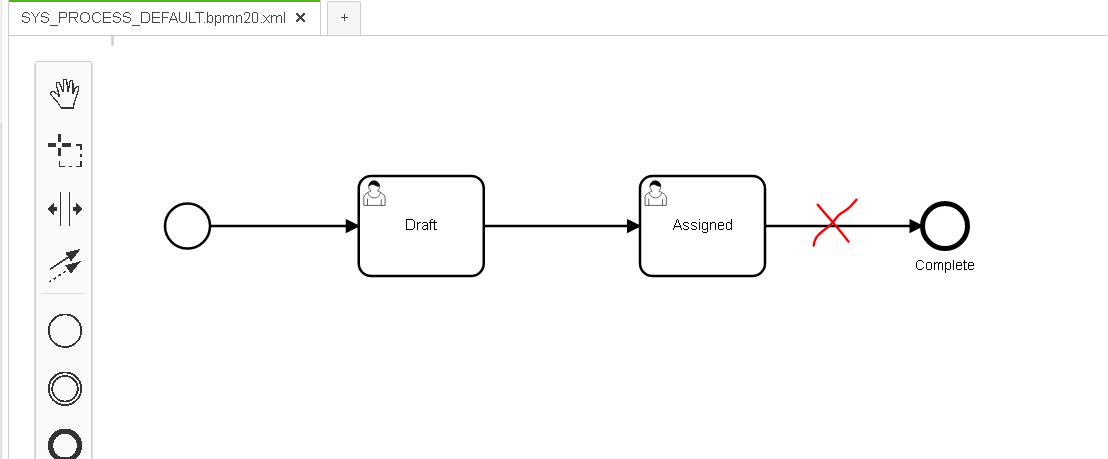
- Drag and drop a
 task from the Floating Tool bar in between Assigned and Complete

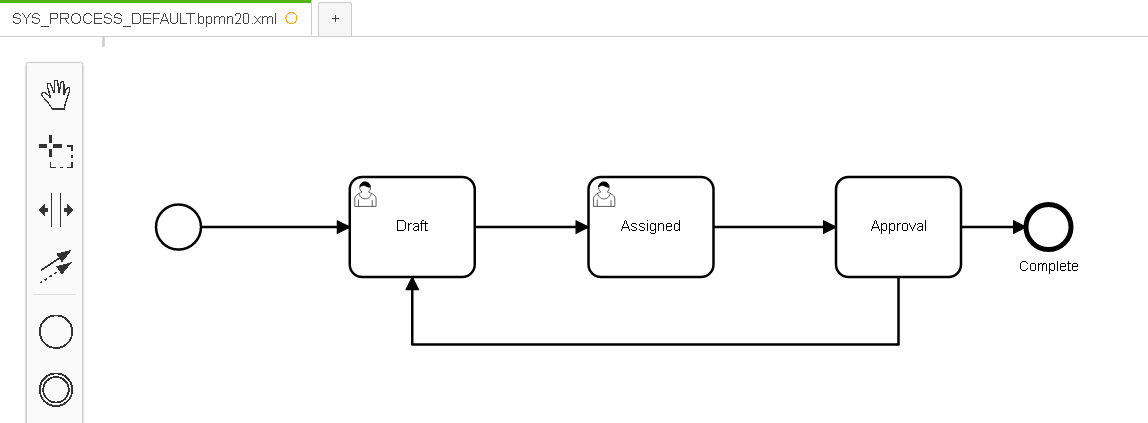
- Double click on the Task and give it a name and use the Connector tool to connect arrows between Assigned and Complete and also have a connector from the Approval task to the Draft task.
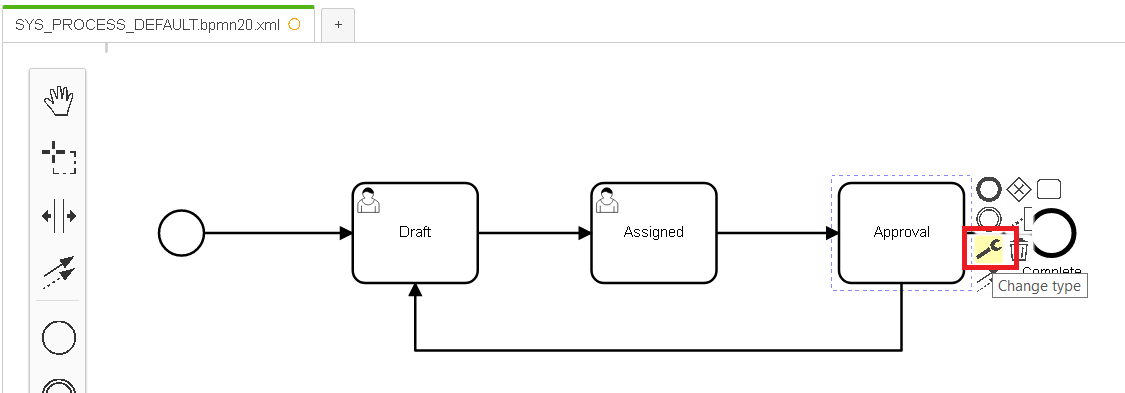
- IMPORTANT: Select the Approval Task and ensure that you click on the Change Type action to change the Task type to User Task
↓
↓

Step 4. Repeat step 3 until all tasks are added or removed as required.
Step 5. Click on save and store the file in a location from where it is easily accessible.
