Excel Templates
Step 1: Naming cells in Excel
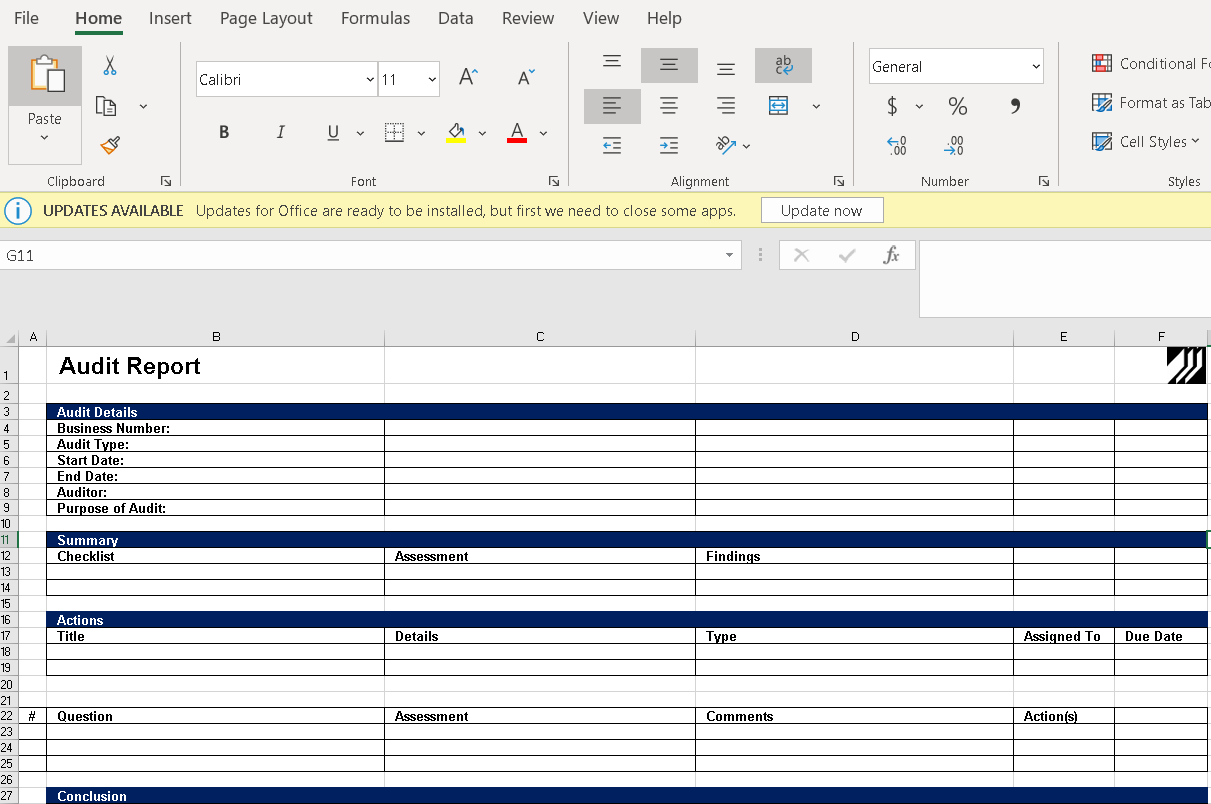
Create a new Excel or open an existing document and ensure that the cells that are going to require integration are Formatted with some form of styling. The System shall perform a search of all formatted cells and hence it is necessary to provide some formatting.
e.g
Step 2: Name the cells for integration.
For each excel cell in which data will be synchronized, repeat the following steps to define a cell name.
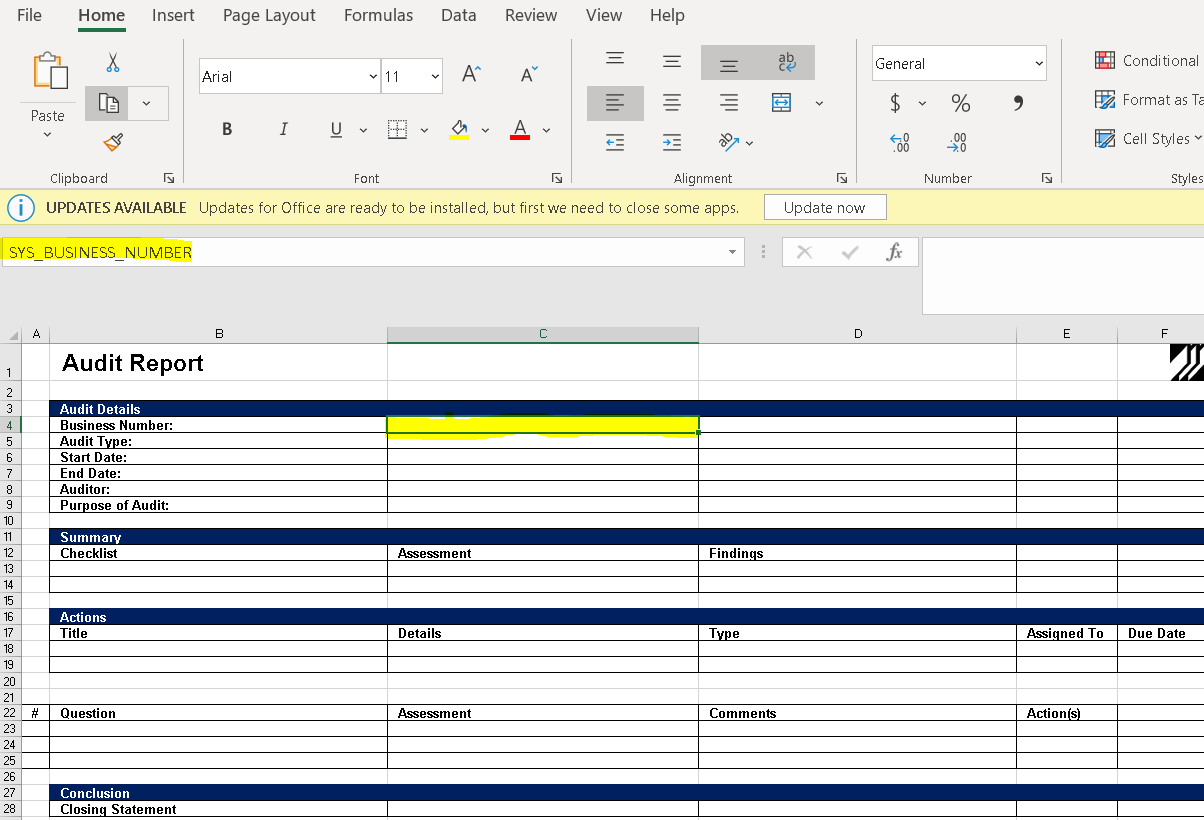
- In the Excel template, select the cell that needs to be integrated and set the name as shown below. The name of the cell shall be the design name of the field.
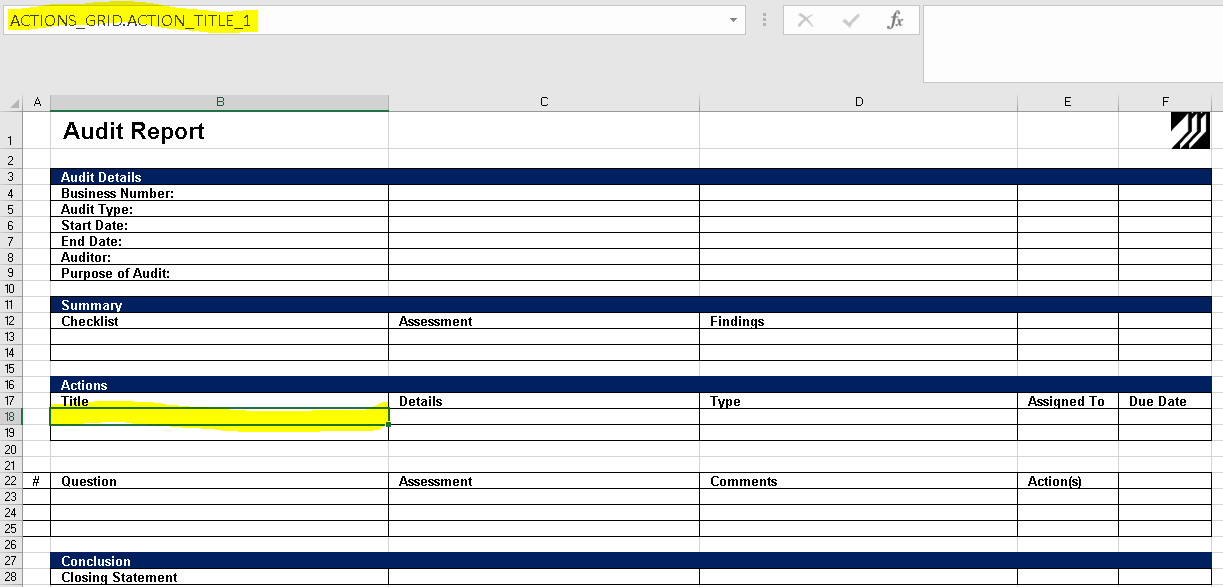
2. For integrating fields that are within Repeating Sections or Repeating Grids then provide the name of the Section or Grid in combination of the Field and ending the name with an '_1'. Format = {REPEAT_SECTIONNAME}.{FIELD_NAME}_1 e.g ACTIONS_GRID.ACTION_TITLE_1
Step 3: Setting cells as Text
For each Excel Cell which shall be integrated with
- Right-click the Cell and then select Format Cells.
The Format Cell dialog opens as shown below:
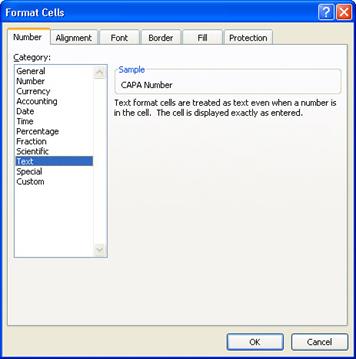
- Select the Text option from the Category list then click OK.
Recommendation for Repeating Sections or Grids: Try to define each repeating section or grid in a separate sheet in the Excel template. This guarantees that you will have all data visible ( this is due to the fact that if there are numerous records in the repeating section then the excel sheet will expand and could overwrite other sections directly underneath it, if all sections are on a single sheet)